

Even if your laptop or desktop PC has one of the best and heftiest SSDs or is equipped with a powerful NAS device it doesn’t mean that you won’t need a pocket-sized flash drive that is both portable and convenient. Today there are thousands of USB flash drives to choose from. They differ in size, security level, speed and other features. Here are some tips on how to choose the best flash drive namely for you.
Best USB Flash Drives:


Last update on 2026-07-10 // The links above are affiliate // Images from Amazon
How to Choose the Best Flash Drive
Performance
One of the most crucial factors you always pay and should pay attention at when choosing a flash drive is its performance. Write and read speeds will affect the time you will spend waiting when transferring your files. There is a great difference between 20 seconds and 10 minutes.
Remember that flash drives that support USB 3.0/3.1 show better performance than those with USB 2.0. They are usually 10-30 times faster.
Security level
If you care about privacy and security of your files then choose a drive with security software. A good example can be SanDisk flash drives that are often provided with SanDisk Secure Access software. It includes data encryption and password protection.
There are also flash drives that use fingerprint encryption. This technology is a combination of secure data storage space and biometric technology.
File recovery
Have you got a bad experience of accidental deletion of files from your flash drive? In such case, an option of file recovery is something your flash drive must have for sure. But note that very often it’s an additional option that you have to download yourself.
Memory storage capacity
Very often one and the same flash drive with the same range of options can have different memory storage capacities varying from 16 GB up to 512 GB. But the choice of capacity depends only on your needs.
Build quality and size
If you don’t want to risk the data on your flash drive it’s necessary to take care not only of its security level but also build quality. Water drops, X-rays and even dust can damage a flash drive and this can lead to the loss of your files.
In order to prevent such terrible consequences a lot of flash drives are waterproof, shockproof, dustproof, etc. Besides, a lot of them are made of very strong types of metal. Thus, it’s always better to have metal casing instead of a plastic box.
OK, all flash drives are small – that’s true. Still, they all differ in size and form, and even the tiniest difference can play a role. The choice of size, as well as memory, depends on your preferences, special needs and requirements.
10 Best Flash Drives
PNY Turbo
The Best 256 GB flash drive

If you need something really special, something that will have enough memory for all seasons of your favorite TV show then PNY TURBO 256 GB is namely for you. This flash drive is the best 256 GB streaming device.
Such compact drive in your pocket can hold up to 47,349 songs. Besides, its 3.0 USB technology will transfer files much faster than its previous 2.0 version. Still, you can easily rely on it when using 2.0 USB ports. Its design deserves your attention as well. It is stylish with a sliding collar and has an integrated loop – special for key chains. And even if something goes wrong you can always count on its free technical support.
- very fast
- free tech support
- up to 256 GB
- compact size
- slider cover
- stylish
- price
- plastic body
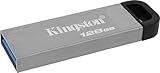
Kingston DataTraveler Kyson DTKN
A Stylish-Looking Fast-Performing Flash Drive

DataTraveler Kyson DTKN/128GB is a compact and lightweight (4g) flash drive, with a sleek-looking metal casing and excellent compatibility that allows its use on a variety of devices run by Windows, Chrome, Linux, or Mac.
This is a highly durable device that comes with a five-year warranty and is available in capacities of up to 256 GB. More importantly, it is compliant with USB 3.2 Gen 1 standard and it provides super-fast speeds that can go up to 200 MBps in the case of reading and 60 MBps in the case of writing, which ultimately makes this device an exceptional choice and one of the best flash drives available on the market.
In other words, if you are after exceptional flash drive performance, DataTraveler Kyson DTKN is the thing for you.
- Lightweight
- Durable
- Compact
- Five-year warranty
- Easy to use
- Fast performance
- None
Samsung MUF-128AB/AM FIT Plus
Great Flash Drive With Environmental Protection

This flash drive has a compact design which prevents it from accidental damages in case of different bumps. There is also a key ring not to lose it. Except for such small size AM FIT Plus comes with read speeds up to 300MB/s. Its USB 3.1 standard makes transferring data always a quick process. Thus, this Samsung flash drive can send several gigabits of 4K media file in less than 20 seconds. By the by, it is also backward compatible and supports USB 3.0 as well as USB 2.0.
AM FIT Plus has a solid build quality. It is can stay up to 72 hours in seawater and survive very low and high temperatures – from 25°C to 85°C when operating and from -40°C to 85°C when non-operating. What is more, this flash drive is shock-proof as well as magnet-proof and X-ray-proof.
- plug-and-play
- USB 3.1
- waterproof
- solid build quality
- compact design
- affordable price
- gets warm
- poor write speeds
SanDisk Ultra Fit USB 3.1
One of the Best Affordable Flash Drives

Another great compact plug-and-play flash drive is SanDisk Ultra Fit USB 3.1. It has a decent read speed which allows transferring a full-length movie in less than half a minute. Though it is a USB 3.1 flash drive it is also backward compatible with USB 3.0 or 2.0 ports.
SanDisk Ultra Fit USB 3.1 is not only a fast but also safe flash drive. It has an option of creating a private folder on your drive with SanDisk SecureAccess software. Its 128-bit AES encryption will help you to keep your files password-protected. One more thing which makes SanDisk Ultra Fit USB 3.1 one of the best models is its RescuePRO Deluxe data recovery software which will save accidentally deleted files on your flash drive. Note that you need to download this software.
- plug-and-play
- affordable price
- USB 3.1
- compact design
- RescuePRO Deluxe data recovery software
- SanDisk SecureAccess software
- great read speed
- write speeds could be better
- a bit flimsy
- made of very thin plastic
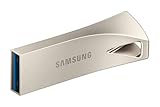
Samsung BAR Plus
Great Fast Flash Drive From Samsung

Don’t like tiny flash cards as they can get easily lost? Then consider Samsung BAR Plus. It’s got a sleek classic design which looks elegant in gray and silver colors. Its metal body also makes it durable and its integrated key ring won’t let you lose it.
This flash drive can withstand 72 hours in the seawater and work in freezing cold up to -25°C. What is more, it is not afraid of hot temperatures as well – Samsung BAR Plus can operate in up to 85°C. It is also shock-proof, magnet-proof and X-ray-proof.
Thanks to the latest USB 3.1 standard Samsung BAR Plus delivers fast performance with read speed up to 300 MB/s. Besides, it comes with innovative V-NAND Technology which provides advanced read as well as write speeds.
- great read and write speed
- durable build quality
- stylish look
- waterproof
- gets warm
- a bit pricey
- no cover for the end
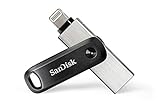
SanDisk iXpand Flash Drive Go
A Storage Device Built for Aging Apple Devices

If you are looking for an easy way to storage files and data from your iPhone X or older, SanDisk iXpand Flash Drive Go is the device to go for. This is a nice-looking device, with a swivel design and more importantly, solid performance that offers 75.25 MBps sequential read and 53.40 MBps sequential write speeds.
With this drive, you are getting both USB3.0 and Lighting compatibility, as well as password protection that keeps your every file safe and sound. In addition, this flash drive also supports automatic backup that requires the iXpand Drive app, and it is available in 64GB, 128GB, and 256GB size.
All in all, SanDisk iXpand Flash Drive Go brings a pretty solid value for the price and definitely presents one of the best flash drives available, of course, if you need a backup for an aging iPhone or some other older Apple device.
- Password protection
- Nice looking
- Solid-performing
- Limited compatibility
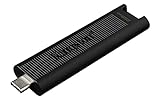
Kingston DataTraveler Max
A Blazing-Fast Flash Drive

Kingston DataTraveler Max is a small and practical Flash Drive that brings super-fast read/write speeds and offers a ton of storage for your precious data. This drive is available in 256GB, 512GB, and 1TB and fitted with USB 3.2 Gen 2 Type-C, as all the latest drives.
More importantly, its read speed is around 1000MBps, while the write speed moves around the 900MBps mark, which is rather impressive. In addition, this drive also comes with an LED indicator and has a reasonable price offering great value for the customer.
On top of that, it is small and portable, and brings exactly what the best flash drive should, offering great performance and small size in a more-than-affordable package.
- LED status indicator
- Fast performance
- USB Type-C connectivity
- Reasonably priced
- Limited security features
SanDisk 128GB iXpand Flash Drive Luxe
A Highly Versatile and Practical Flash Drive

If you need a portable and decent-performing Flash Drive that offers excellent versatility and compatibility, the SanDisk iXpand Flash Drive Luxe is the device for you. To be exact, this drive delivers a solid sequential read/write speed of around 90MBps and is compatible with iOS, Windows, Android, and Mac.
Moreover, this drive is available in 64GB, 128GB, and 256GB, and features both Lightning and USB Type-C connectivity, offering great value to the customer. Also, it offers password protection and comes with a two-year warranty that isn’t much; nonetheless, it adds to the value of the device.
Therefore, if you require one of the best Flash Drives available, that offers the much-needed versatility and compatibility, SanDisk iXpand Flash Drive Luxe is certainly the device for you.
- Good compatibility
- Dual connectivity
- Password protection
- Decent performance
- A bit pricey
Patriot Supersonic Rage Pro
One of the Best

Patriot Supersonic Rage Pro is a reasonably priced, fast-performing Flash drive, with great portability and weight of only 11 grams. In other words, it presents a great deal for anyone looking for solid-performing and practical backup drive.
When talking about exact numbers, you should know that Patriot Supersonic Rage Pro delivers read/write sequential speeds of around 450MBps and up to 8000 IOPS for 4K random write performance. Moreover, this drive is compatible with Windows, Mac, and Linux, and available in 128GB, 256GB, and 512GB size.
Patriot Supersonic Rage Pro has a five-year warranty and features UASP support, LED indicators, as well as aluminum housing. Its interface is USB 3.2 Gen. 1, while the device itself offers plug-and-play functionality.
In short, there is everything you may expect from the best Flash drive. Therefore, if you need one, Patriot Supersonic Rage Pro is the device to look for.
- Five-year warranty
- Very good performance
- Aluminum housing
- Good compatibility
- UASP support
- Plug-and-play functionality
- None
SanDisk Extreme PRO
Solid State Drive in a Flash Drive Suit

SanDisk Extreme PRO is a discrete looking, super-fast device that offers SSD performance in the flash drive edition. In other words, if you are seeking blazing data transfer speeds, this drive will give it to you.
Its sequential read speed of 420 MBps and sequential write speed of 380 MBps will give you great productivity, while you will also get great protection, all in one, due to its file encryption and password protection coming from the SanDisk SecureAccess software.
Have in mind that SanDisk Extreme PRO also comes with a lifetime warranty and that, due to its retractable design and aluminum metal casing, it offers great durability. On top of that, this drive is also lightweight (17g), compact, and easy to use.
Therefore, if you are after a full package that brings both excellent performance and great sturdiness to the customer, SanDisk Extreme PRO is the tool for you.
- Super-fast performance
- Durable
- Lifetime warranty
- Good security features
- Compact
- None
Summary
Of course, flash drives can’t offer as much as external hard drives can, for example. Still, their compact size is the main reason why everyone purchases them. And whatever flash drive you choose, remember that it must correspond to your personal needs. It’s always up to you to decide which streaming device is the best for you.
Hi,
PATRIOT SUPERSONIC RAGE 2 is listed almost as fast as the PNY TURBO and someone puts its speed under CONS???? 😀
Cheers!
J.
True. Fixed =)
Thank you
Peak read not bad, but random write bad, just like most of them besides the Corsair GTX and Sandisk Extreme being the only two with good “average” use performance, which is why they cost near or over double what the others do, in order to put an SSD controller in them.
This article feels like regurgitated facts from other articles and spec sheets. We need someone to do some real tests and make consistent comparisons. Write speed is the critical factor with large drives, and we need some real life testing. That means not only a couple of huge files, but also copying thousands of small files such as backing up a hard drive. And to report not only the speed, but the storage used. There is anecdotal evidence that flash drives can use up to twice the storage when storing lots of small files.
Heat should be consistently reported. It was noted as a con with a Samsung drive and one other but not mentioned for the others. That is not entirely credible. In fact, the Samsung drive has an all metal case ideal for dissipating heat, so it may feel hot on the outside while actually cooling the inside more effectively, just a thought — but anyway really accurate measurements of temperature/heat are needed for each device if it is going to be considered.
Reliability is very important and also very difficult to gather data on. But somebody should be stress-testing these top contenders over time to get some idea on failure rates. It seems like it wouldn’t cost that much to really test these drives and give us some trustworthy data that truly reveals the differences and similarities and tradeoffs.
The SanDisk PRO gives you blistering speeds, offering 420 MB/s on the reading front and 380 MB/s on the writing end, which is 3–4x faster than what a standard USB 3.0 drive will offer.
“11 Best … ” takes on new meaning.
The SanDisk Extreme Pro is over twice as fast as the Extreme Go.
Extreme Go 64 & 128Gb – $17.99, $31.99
Sequential Read Performance
Up to 200 MB/s
Sequential Write Performance
Up to 150 MB/s
Extreme Pro 128 & 256GB – $44.95, $72.99 WD/SD
Sequential Read Performance
Up to 420MB/s
Sequential Write Performance
Up to 380MB/s
IIRC, the Flash Voyager GTX has “Up too” speeds of
440 and 440MB/s – 128, 256, 512GB and 1TB.
While everybody’s speeds are theoretical maxes, I wonder if Corsair’s driver makes them faster. I’ve got (2) Extreme Pro’s but no GTX’S. I guess tomorrow would be the day to get one.
Blaze B30 supports USB 3.2 Gen 1 yet as con it is listed that it doesn’t support USB 3.0. I think your info is wrong.